Lighting placement for restoring color without backscatter means positioning and aiming underwater lights so that illumination reaches the subject while reflected light from suspended particles is kept out of the camera’s view. The practical strategy is to bring strobes or video lights close to the camera’s sides, angle them outward, and illuminate the subject from a short distance; this helps reveal colors absorbed by water while reducing the bright specks known as backscatter. The approach matters because red light is rapidly absorbed underwater, while particles can scatter light back toward a lens. NOAA notes that water clarity and light availability shape underwater visibility and color, and a widely cited optical rule of thumb is that red wavelengths fade first, often within the first few meters depending on conditions. The sections below explain the underlying lighting geometry, compare placement strategies for strobes and continuous lights, and outline practical adjustments for visibility, color accuracy, and safety.
Underwater Lighting Placement and Backscatter Control
Backscatter is light reflected or scattered toward a camera by particles suspended in the water column, such as plankton, sediment, and organic matter. Unlike color loss—which occurs because water absorbs wavelengths unevenly—backscatter is primarily a geometry and water-clarity problem. The two effects can occur together: a subject may look blue or green because warm wavelengths have been absorbed, while particles between the light and lens appear as bright spots.
The central placement principle is to separate the illumination path from the camera’s viewing path. Lights placed too close to the lens illuminate particles directly in front of it, sending scattered light back along nearly the same path. Moving lights outward and aiming them across the subject rather than straight along the lens axis reduces that overlap. Bringing lights closer to the subject also shortens the distance light travels through particle-filled water.
There is no universal spacing or angle: the right setup changes with subject size, visibility, lens field of view, and whether the photographer uses strobes or continuous video lights. The following strategies translate the optical principle into common underwater configurations.
Off-axis lighting
Off-axis lighting means placing a light to one side of the lens’s viewing axis and aiming it so the beam covers the subject without shining directly through the water in front of the camera. In practice, photographers extend strobe arms outward and angle the heads slightly away from the lens. The goal is not simply to maximize distance from the camera: the beam still needs to overlap the subject, but should avoid lighting the nearest particles.
This approach is especially useful in hazy water or when photographing wide scenes, where many particles can sit between the lens and the subject. If a light is visible in the frame or creates an uneven hotspot, adjust its position and beam angle incrementally. A test image is more reliable than a fixed rule because beam width and arm length vary across equipment.
Close, targeted illumination
Close lighting means moving the light nearer to the subject and reducing the length of the illuminated water column. Water absorbs and scatters light, so lighting a nearby subject generally wastes less output than illuminating it from far away. For macro photography, a pair of small strobes can be positioned wide of the lens and directed inward toward the subject, with their beams kept off the surrounding water where possible.
The method also helps restore color because artificial white light supplies wavelengths that have been reduced with depth. Its limits are practical: overly close or powerful lights can create harsh highlights, flat illumination, or reflections from shiny surfaces. Reduce strobe power, change the angle, or diffuse the light when highlights become distracting.
Ambient-light and mixed-light techniques
Ambient-light photography relies primarily on sunlight already present in the water, while mixed-light photography combines ambient light with strobes or video lights. Ambient light avoids adding artificial illumination to particles near the lens, but it cannot fully restore colors that have been absorbed. Mixed lighting can bring color back to a foreground subject while preserving the broader blue or green background.
For a balanced result, expose the background with the camera settings and use the artificial light to illuminate the subject. This is a starting point, not a fixed recipe: depth, weather, water clarity, and subject distance all affect exposure. When the water is especially turbid, reducing the amount of illuminated water—by moving closer, narrowing the beam, or choosing a tighter composition—may improve the image more than increasing light output.
Strobe and Video-Light Placement Strategies
The main distinction between strobes and continuous lights is when the light is emitted. A strobe delivers a brief flash synchronized with the exposure; a video light remains on while recording or composing. Both can restore foreground color, but each calls for placement suited to the subject and the camera’s field of view. Underwater photography guidance from equipment manufacturers, including Ikelite and SeaLife, commonly emphasizes keeping lights away from the lens axis and adjusting their angle to control backscatter.
Strobe positioning for still photography
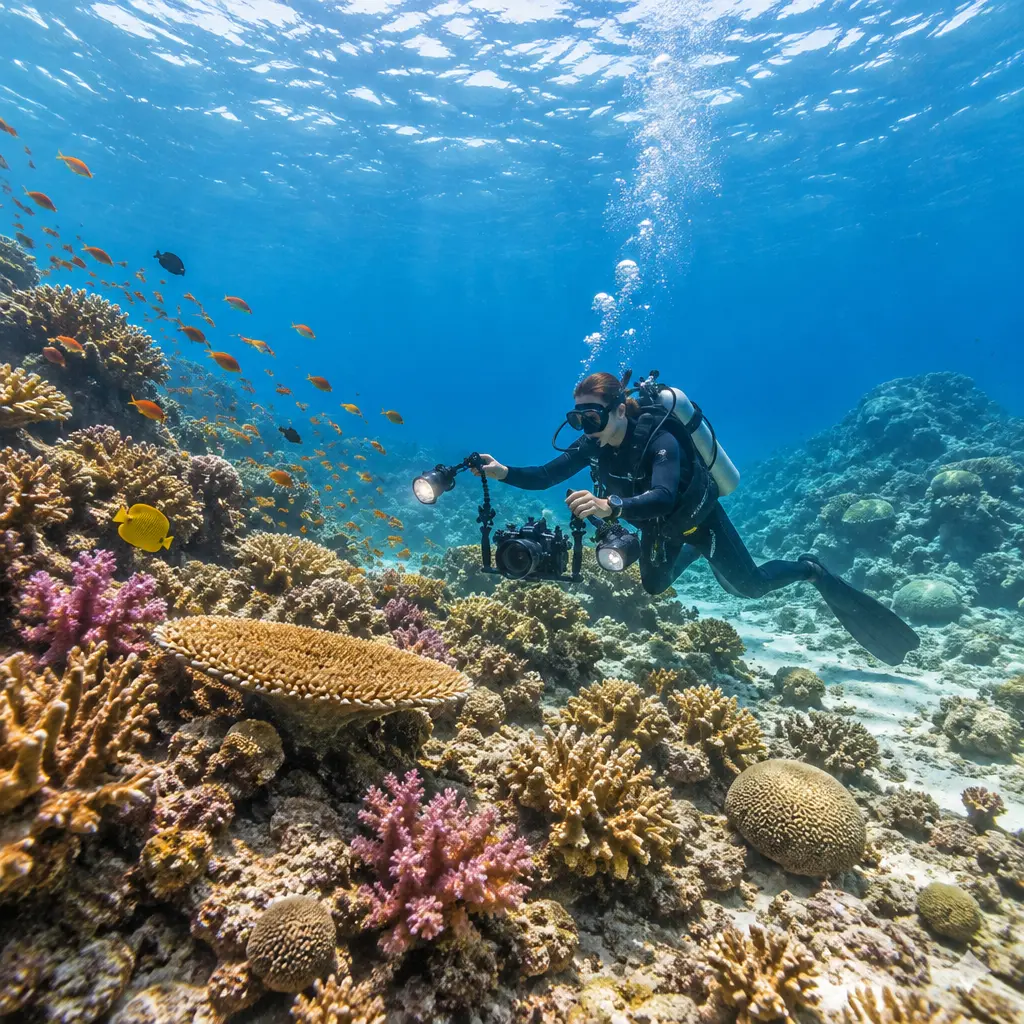
Strobes are flash units used for still images. For close-up subjects, extend them to the sides of the camera and angle them inward enough to illuminate the subject, while avoiding a direct, on-axis beam. For wide-angle scenes, the lights often need greater lateral separation and a broader, outward-aimed beam so the frame is illuminated without lighting the water immediately in front of the dome port.
A simple field test is to inspect the frame edges and dark areas after each exposure. Repeated bright dots suggest that illuminated particles are returning light to the lens; move the strobes farther out, turn them slightly outward, or reduce output. If the subject becomes dim, redirect the beam or move closer rather than immediately returning both strobes to a forward-facing position.
Video-light positioning for moving images
Video lights provide continuous illumination, making their beam pattern and spill visible during composition. Place them laterally and aim them across the subject, then check the live view for visible particle sparkle, glare, or uneven coverage. Because the lights remain on, avoid shining them into a dive partner’s eyes or disturbing wildlife; follow local rules and responsible-diving guidance.
For wide-angle video, a pair of lights can be spread apart to cover the frame, but the outer edges may remain dark if the beams are too narrow. For macro video, bring the lights closer and reduce power as needed to prevent clipped highlights. Diffusers and beam-angle accessories can soften coverage, though they do not eliminate backscatter if the light still directly illuminates particles in front of the lens.
Beam angle, distance, and subject scale
Beam angle describes how widely a light spreads; distance determines how much the beam diverges and how much water it must cross. A broad beam is useful for large scenes but can illuminate more suspended particles. A narrower beam can reduce spill for a small subject, although it may create a bright center and dark edges. The best match depends on the lens’s field of view and the subject’s dimensions.
A practical sequence is to frame the subject first, place lights just outside the frame, and then adjust their aim until the subject is evenly lit. If the water is cloudy, shorten the light-to-subject distance and avoid flooding the space between camera and subject with light. These adjustments connect placement choices directly to the optical causes of both color loss and backscatter.
Color Restoration, Visibility, and Field Adjustments
Color restoration is the return of color information that ambient underwater light has lost through selective absorption. It is not the same as removing backscatter: a well-lit subject may still have particle spots, and a clean-looking image may still lack warm colors. Effective technique treats color, contrast, and particle reflection as related but separate problems.
Why colors disappear underwater
Water absorbs light in a wavelength-dependent way. Longer wavelengths, particularly red, are attenuated more rapidly than blue-green light, so objects can appear less colorful as depth or distance increases. NOAA’s Ocean Explorer materials describe this selective absorption and explain why underwater scenes often shift toward blue. The exact rate depends on water type, dissolved material, particles, and illumination; therefore, a single depth threshold should not be treated as universal.
A nearby artificial light can restore some color by illuminating a subject with a broader spectrum, but it cannot restore detail that is hidden by distance or poor visibility. Getting closer is often the most effective combined adjustment: it reduces the amount of water between camera and subject while allowing the light to reach the subject more efficiently.
Water clarity and backscatter risk
Water clarity describes how readily light can pass through water without being absorbed or scattered. Suspended particles increase scattering and can make backscatter more likely, especially when a light shines toward the lens through the foreground. Because visibility varies substantially between sites and even across a single dive, photographers should assess the water before choosing a lighting layout.
In low visibility, favor close subjects, compact compositions, and lights aimed across rather than directly toward the camera. In clearer water, wider light placement may be practical for broad scenes. No single global visibility statistic can prescribe a correct strobe angle; local conditions and test frames are the useful evidence in the field.
A repeatable underwater lighting check
A repeatable check turns placement into a controlled adjustment rather than guesswork. Change one variable at a time—light position, aim, distance, or power—and compare results. A field log can record water clarity, subject distance, lens, light settings, and the placement that produced the cleanest color.
- Frame the subject and identify whether the shot is macro, portrait, or wide-angle.
- Place lights outside the lens axis and aim them at the subject, not through the foreground water.
- Take a test image or inspect the video preview for bright particle spots, hotspots, and dark edges.
- For backscatter, move the lights outward or angle them away; for weak color, move closer or redirect light onto the subject.
- Adjust power and exposure only after placement is reasonable, then recheck highlights and background balance.
A useful illustration for training is a two-panel diagram: one panel shows a light near the lens illuminating particles in the camera’s path; the other shows lights set wide and aimed across a nearby subject. A second chart could compare subject distance, beam width, and particle illumination qualitatively, since actual results depend on local water conditions and equipment.
Conclusion: Place Light on the Subject, Not in the Water Column
Lighting placement restores color most effectively when it supplies useful illumination to a nearby subject without sending reflected particle light back toward the camera. Off-axis positioning, close and targeted illumination, and careful use of ambient and artificial light address different parts of the problem. Strobes suit still photography, while continuous lights make beam coverage visible during video work; both benefit from deliberate control of angle, distance, and spill.
The broader lesson is that light output alone does not determine image quality. Water clarity, wavelength absorption, subject distance, beam shape, and camera geometry all matter. Before a dive, review equipment guidance and local conditions; underwater, test one change at a time and prioritize responsible lighting around people and marine life.
Sources: National Oceanic and Atmospheric Administration, Ocean Explorer, “Why Is the Ocean Blue?”, https://oceanexplorer.noaa.gov/facts/oceanblue.html; Ikelite, Underwater Photography Lighting and Strobe Techniques, https://www.ikelite.com/blogs/faq/underwater-photography-lighting; SeaLife, Underwater Photography Tips, https://www.sealife-cameras.com/underwater-photography-tips/