
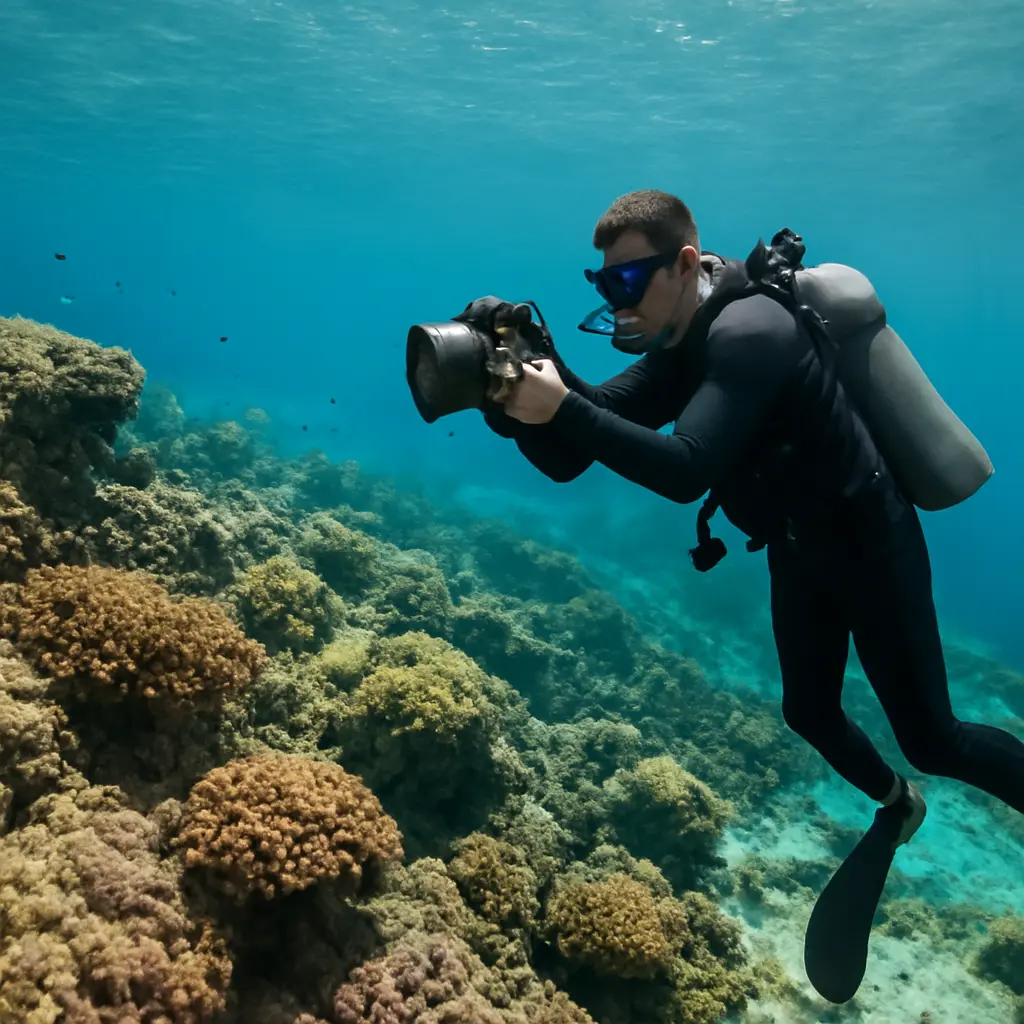
Underwater shooting is the practice of making photographs or video beneath the water’s surface, where light, color, focus, and equipment behave differently than they do in air. Strong results depend on choosing a suitable camera and housing, managing buoyancy and lighting, and following safe-diving practices; these skills matter in a field that ranges from recreational travel photography to scientific documentation and film production. This guide explains the fundamentals of underwater imaging, including light and color, equipment, composition, exposure, safety, and practical techniques for improving image quality.
Underwater imaging depends on light, water, and distance
Underwater photography is image-making in an environment where water absorbs and scatters light. The National Oceanic and Atmospheric Administration (NOAA) describes water clarity in terms that include the amount of material suspended in the water, while the U.S. Geological Survey (USGS) explains that suspended particles can reduce transparency. For photographers, the practical result is that colors fade and contrast falls with depth and distance. Working close to a subject, controlling lighting, and understanding the water conditions are therefore central—not optional refinements.
Color absorption and depth
Water selectively absorbs wavelengths of visible light. Longer red wavelengths are lost relatively quickly, followed by orange and yellow, so a subject may look blue or green even when it is brightly colored at the surface. The exact rate depends on water clarity, dissolved substances, depth, and sunlight. A red object photographed at depth may appear dull because the red light needed to reproduce its color has not reached it in sufficient quantity.
A camera’s white-balance setting can correct some color casts in shallow, well-lit conditions, but it cannot recreate light that is absent. For close subjects, a strobe or underwater video light supplies illumination with a fuller color spectrum. For ambient-light scenes, shoot closer to the surface when possible and use RAW capture if the camera supports it, preserving more latitude for color correction.
Backscatter and working distance
Backscatter is the appearance of bright flecks or haze caused when light reflects from particles suspended between the camera and subject. Because the camera records this reflected light along with the subject, the effect is especially visible in murky water or when a flash points directly forward. Moving closer reduces the volume of water between lens and subject, while positioning strobes off-axis helps keep their strongest beams from illuminating particles directly in front of the lens.
This distance principle links water conditions to composition: a dramatic wide scene may be difficult to record in low visibility, but a nearby animal, coral detail, or diver portrait can remain clear. A useful rule is to get as close as the subject and safe approach allow, then frame tightly enough to limit distracting water.
Underwater camera systems require matching protection and controls
An underwater camera system combines an imaging device with a pressure-resistant housing, suitable lens or port, and controls that remain usable underwater. The system may be a compact camera in a dedicated case, a mirrorless or DSLR camera in a manufacturer-specific housing, or an action camera designed for wet environments. The right choice depends on depth rating, image-quality needs, control access, lighting options, and the user’s experience.
Housing, seals, and depth ratings
A housing keeps water away from the camera and transfers pressure loads to its structure and seals. An O-ring is a circular elastomer seal compressed between mating surfaces; debris, hair, sand, or damage can compromise its seal. Before every dive, inspect and clean the sealing surfaces, confirm the housing is closed according to its manual, and test it as recommended by the manufacturer. Never assume that a housing’s depth rating applies to a different housing, port, or accessory combination.
A housing also changes how the camera is operated. Buttons may feel different, and some controls may be difficult to reach with gloves. Set frequently used options—such as focus mode, file format, and exposure controls—before entering the water, then verify that the controls work during a controlled shallow-water check.
Ports, lenses, and image coverage
A housing port is the transparent or domed optical window through which the lens sees the scene. Flat ports are commonly used for macro and close-up work, while dome ports are often paired with wide-angle lenses. Water changes the apparent field of view through a flat port, making subjects look larger and nearer; dome-port performance depends on correct matching and setup. Consult the housing and lens manufacturers’ port charts rather than assuming one port suits every lens.
Wide-angle lenses help capture large animals, divers, and reef scenes at close range. Macro lenses make small subjects easier to frame, but their narrow field of view and shallow depth of field demand careful focus and stable positioning. These categories—wide-angle, close-focus wide-angle, and macro—are practical photographic approaches rather than rigid rules; the subject and water clarity should guide the choice.
Buoyancy and handling accessories
Buoyancy arms, trays, handles, and lanyards can improve handling, but they add bulk and must not interfere with safe diving. A well-balanced camera rig should be manageable without pulling the diver out of trim or encouraging contact with the bottom. Test the rig in a controlled setting, secure loose accessories, and avoid carrying equipment in a way that compromises access to essential dive gear.
Underwater exposure and lighting shape the image
Exposure is the amount of light recorded by the camera, controlled principally by aperture, shutter speed, and ISO. Underwater, these settings must be considered alongside depth, movement, ambient light, and artificial illumination. A balanced image may combine ambient light for the background with flash or video light for a nearby subject.
Aperture, shutter speed, and ISO
Aperture controls the lens opening and influences depth of field; shutter speed controls how long the sensor receives light and how motion is rendered; ISO describes the sensor’s sensitivity setting, with higher values generally increasing visible noise. For moving fish, a faster shutter can reduce motion blur, while a smaller aperture can increase depth of field but requires more light. The best settings depend on the camera, lens, subject movement, and available illumination, so test them in similar conditions before an important dive.
For still subjects, stable positioning and deliberate focus often matter more than pursuing a particular exposure recipe. For moving wildlife, prioritize a shutter speed that suits the motion, then adjust aperture and ISO within the camera’s usable range. Review images and histograms when practical, but do not let camera checks distract from diving safety or awareness.
Strobes and underwater lights
A strobe is a brief, powerful flash used mainly for still photography; a continuous video light illuminates a scene for video and can also assist with close-up stills. Strobes can restore color to nearby subjects and freeze motion, while continuous lights make it easier to see the illumination and focus on a subject. Both have limits: light intensity falls rapidly with distance, and positioning a light too close to the lens axis can reveal backscatter.
Place strobes to the sides of the housing and angle them so the edges of their beams illuminate the subject. Adjust their power and position rather than relying on a single fixed setup. In clear water, a wider strobe separation may help limit particle reflections; in tight macro work, a more controlled, close placement can provide precise illumination.
Ambient light and mixed-light scenes
Ambient-light photography uses sunlight available in the water, often for reefscapes, silhouettes, and large animals near the surface. Artificial light is usually more effective for nearby subjects, while sunlight can preserve the sense of depth and scale in the background. Combining the two requires balancing the background exposure with the subject illumination.
A practical approach is to expose for the scene’s ambient background, then adjust strobe output to illuminate the foreground subject. In video, match the light’s color temperature to the camera’s white balance as closely as the equipment allows. If the water is hazy, avoid illuminating a large volume of water and favor a closer composition.
Underwater composition should protect both the subject and habitat
Composition is the arrangement of visual elements in a frame. Underwater, it also includes controlling distance, managing distracting water, and choosing a viewpoint that does not damage habitat or disturb wildlife. Strong images often use a clear subject, a deliberate background, and enough negative space to separate the subject from its surroundings.
Subject distance, perspective, and framing
Getting closer improves contrast and reduces the water column between camera and subject, but the approach must not stress wildlife or create risk. Shoot at the subject’s level when safe and appropriate; looking slightly upward can produce a cleaner background and convey scale. For portraits, leave space in the direction the animal is facing or moving. For reef scenes, use a foreground element to create depth without touching or standing on coral.
Wildlife and environmental ethics
Ethical underwater photography avoids chasing, cornering, touching, feeding, or manipulating wildlife for a photograph. NOAA’s marine wildlife guidance emphasizes observing animals without harassment and respecting applicable protected-area rules. Divers should maintain buoyancy, keep fins and equipment clear of the seabed, and follow local instructions. A photograph is not worth damaging coral, disturbing an animal, or endangering a diver.
Environmental awareness also improves image-making: a patient photographer can wait for an animal to enter a suitable composition instead of forcing an encounter. If a subject shows signs of stress or changes behavior because of the camera, increase distance and end the attempt.
Dive safety comes before underwater photography
Underwater photography adds task loading to diving: the camera can draw attention away from depth, time, air supply, navigation, and a buddy. The Divers Alert Network (DAN) advises divers to maintain training, plan dives, and use a buddy system. Photographers should be comfortable with the dive before adding camera tasks and should follow their training agency’s procedures and the dive plan.
Plan the dive and manage task loading
Before entering the water, agree on the route, depth and time limits, communication signals, lost-buddy procedure, and turnaround criteria. Check that the camera rig is secure and that it does not obstruct gauges, regulators, or access to other equipment. During the dive, look up regularly, remain aware of the buddy and surroundings, and pause photography whenever attention is needed for buoyancy, navigation, or communication.
Buoyancy, ascent, and equipment discipline
Neutral buoyancy helps a diver remain at a chosen depth without continuous finning or contact with the environment. Practice hovering and camera handling in a low-risk setting before photographing delicate habitats or moving subjects. Follow the dive computer, training, and dive plan for ascent rate, safety stops, and depth limits; a camera must never become a reason to extend a dive or miss a required procedure.
Secure the camera when it is not in use, and avoid handing it off or reaching for accessories in a way that disrupts stability. If the rig becomes difficult to manage, stop shooting, regain control, and prioritize the dive. DAN’s accident-prevention resources repeatedly emphasize planning and sound decision-making; the same principles apply when photography creates additional distraction.
A repeatable workflow improves underwater results
A repeatable workflow reduces preventable equipment and exposure problems. Preparation on land, careful checks before entering the water, and a short review after each dive help photographers learn without rushing underwater.
Before the dive
- Confirm that the housing, ports, lens, and accessories are compatible and rated for the planned conditions.
- Inspect O-rings and sealing surfaces, remove debris, and close the housing as its manufacturer instructs.
- Charge batteries, format or verify memory cards, and set file format, focus mode, and initial exposure controls.
- Check strobes or lights, battery condition, sync connections, and arm positioning.
- Agree on the dive plan with the buddy and decide how to secure the camera if conditions change.
During and after the dive
Start with a simple subject and confirm focus, exposure, and lighting before attempting complex scenes. Take a few frames, review them only when safe, and adjust one variable at a time. After the dive, rinse and maintain the housing according to its manual, inspect for signs of leakage, and back up images. Reviewing which frames show haze, motion blur, or poor color helps identify whether the next improvement should be distance, light placement, focus technique, or exposure.
For example, a reef photographer working in clear tropical water may use a close wide-angle composition with strobes for foreground color and sunlight for the background. In lower visibility, the same photographer may switch to a nearby macro subject, keeping strobes off-axis to reduce backscatter. The specific settings will vary, but the underlying decisions—reduce distance, choose a suitable subject, and control illumination—remain broadly useful.
Conclusion: fundamentals connect image quality with safe practice
The fundamentals of shooting underwater are managing light and color, choosing a camera system with an appropriate housing and port, balancing ambient exposure with artificial illumination, and composing from a safe, respectful distance. Because water absorbs color and scatters light, getting close and positioning lights carefully can improve clarity. Because photography adds task loading, planning, buoyancy, buddy awareness, and adherence to training must take precedence over any image.
Begin in controlled conditions, learn the housing and lighting system before a demanding dive, and practice one technique at a time. For further guidance, consult the camera and housing manufacturers’ manuals, NOAA’s responsible wildlife-viewing guidance, and DAN’s diver-safety resources. Better underwater photography starts with better preparation—and with leaving the environment and the dive team safe.
Sources: National Oceanic and Atmospheric Administration, Ocean Facts: How Does Sound Travel in the Ocean? and marine wildlife viewing guidance, https://oceanservice.noaa.gov/facts/sound.html; U.S. Geological Survey, Water Science School: Turbidity and Water, https://www.usgs.gov/special-topics/water-science-school/science/turbidity-and-water; Divers Alert Network, DAN Safety Resources, https://dan.org/safety-prevention/; National Oceanic and Atmospheric Administration, Marine Life Viewing Guidelines, https://www.fisheries.noaa.gov/topic/marine-life-viewing-guidelines; NOAA Ocean Service, Ocean Facts: How Much of the Ocean Is Unexplored?, https://oceanservice.noaa.gov/facts/exploration.html.


